Instead of coordinating fixture moves after demolition, connect your bathroom remodel plumbing reroute to an approved layout, a licensed plumber’s rough-in plan, and inspection checkpoints before you close walls or floors. For Conroe and Woodlands homeowners, A Finishing Touch Remodeling provides bathroom remodeling services; establish responsibility for plumbing design, permits, and inspections before construction begins.
- A bathroom remodel plumbing reroute starts with confirmed fixture locations, drain feasibility, and a coordinated rough-in plan.
- A Finishing Touch Remodeling serves Conroe and Woodlands homeowners planning bathroom remodeling.
- Confirm plumbing responsibilities and inspection requirements before demolition, not after fixtures arrive.
- Keep concealed plumbing accessible until required inspections and testing are complete.
Why this matters
A bathroom layout is not ready for construction just because the fixtures fit on paper. A toilet move also involves drainage and venting; a shower move involves the drain, water supplies, waterproofing, and finished floor assembly.
A Finishing Touch Remodeling is a fit for Conroe and Woodlands homeowners seeking bathroom remodeling services. Coordinate the plumbing scope separately and explicitly rather than assuming every related task belongs to the remodeling contractor.
For a 2026 bathroom project, the useful deliverable is a coordinated drawing and scope—not a collection of fixture photos. Every trade needs the same fixture locations, wall positions, and finished dimensions.
Before you start
- Gather access and product information. Assemble existing bathroom photos, available house plans, selected fixture installation instructions, and access to relevant plumbing areas. Arrange a licensed plumber’s assessment before committing to fixture relocation.
- Assign authority and responsibility. Identify who handles plumbing design, permit applications, inspections, demolition, structural review, and surface restoration. Confirm the applicable requirements with the authority having jurisdiction over your property.
- Resolve the hidden constraint first. A new fixture position must work with the drain and vent system, not just the water supply. Floor framing, slab construction, and the existing drain connection can change whether your preferred layout is practical.
Do not buy fixtures solely from their exterior dimensions. Installation instructions identify connection locations and other requirements that your contractor and plumber need before rough-in.
Fixture layout and plumbing feasibility
Build the shared layout
- Record the existing conditions. Photograph the bathroom and accessible plumbing. Mark known fixture locations, shutoffs, drains, cleanouts, and access points without treating concealed pipe routes as confirmed facts.
- Prepare 3 plan views. Use an existing-condition plan, a proposed fixture layout, and a rough-in coordination plan. These are recommended planning documents, not a statement of local permit requirements.
- Mark finished surfaces. Show proposed wall faces, shower boundaries, vanity position, and flooring transitions. Distinguish framing dimensions from finished dimensions so tile and wall buildup do not shift the intended connections.
- Have the plumber assess the route. Ask how each moved fixture connects to water, drainage, and venting. Identify where investigation is needed before the route can be confirmed.
- Resolve structural conflicts. Have the appropriate qualified professional assess any proposed framing alteration or slab work. Do not authorize cutting based only on the shortest pipe route.
Expected result: You have a layout the plumber has reviewed for feasibility, with unknown conditions identified rather than hidden inside a fixed construction promise.
Choose the amount of relocation deliberately. Keeping fixtures near existing connections and moving them across the room are different scopes, even when the finished bathrooms look similar.
| Layout approach | Best for | Advantage | Limitation |
|---|---|---|---|
| Retain fixture locations | Homeowners satisfied with the current arrangement | Reduces the need to develop new fixture connection routes | Does not resolve a poor layout simply by replacing finishes |
| Relocate fixtures | Homeowners whose current arrangement prevents the intended use | Allows a different bathroom arrangement | Requires investigation and coordination of new plumbing routes and affected construction |
Keeping a location does not prove the existing plumbing is suitable for reuse. Condition, fixture requirements, and applicable rules still need review.
Scope, permits, and trade handoffs
Define the work before demolition
- Write a fixture-by-fixture scope. State whether each toilet, sink, shower, or tub stays, moves, or is removed. Include the selected fixture documentation and identify any decisions that remain open.
- Name the responsible party for each task. Cover water isolation, demolition, plumbing work, debris removal, required inspections, wall repair, waterproofing, flooring, and finish installation. A task without an owner is an unresolved scope item.
- Confirm the permit path. Ask the applicable permitting authority what the actual project requires. For a 2026 application, use current requirements rather than an old project’s checklist or a neighbor’s experience.
- Document concealed-condition decisions. Establish who reviews discoveries, approves scope changes, and authorizes additional work. Require written approval before a changed route affects another trade.
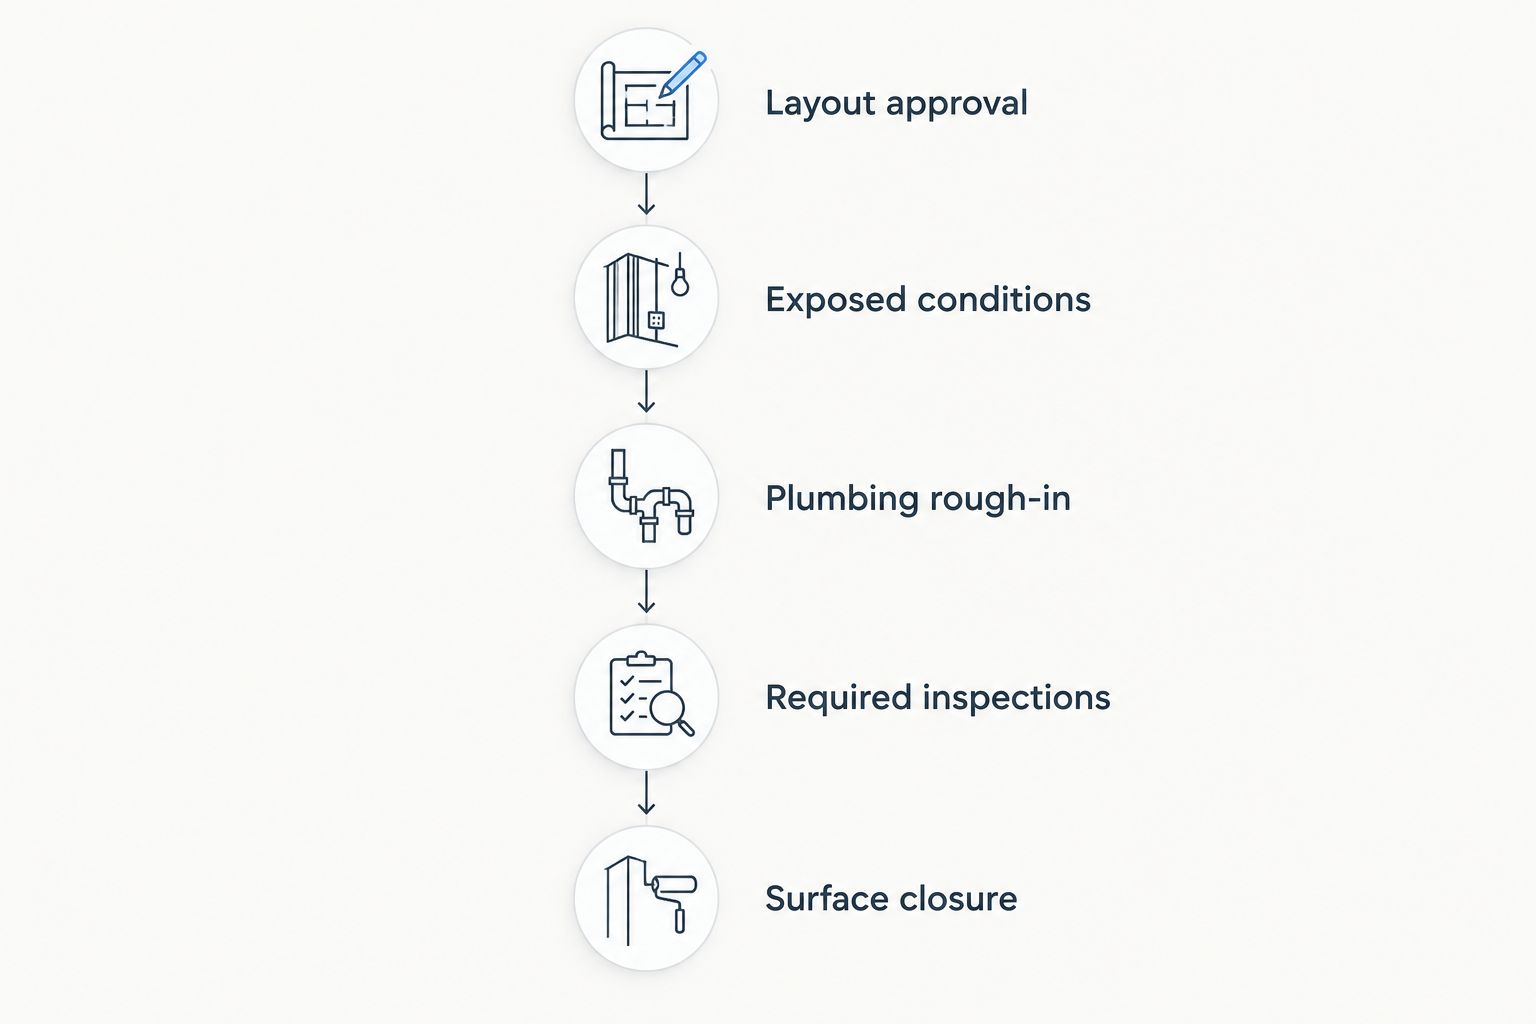
- Set 2 approval checkpoints. Review the layout before demolition and review the exposed conditions before committing to the final rough-in route. These are coordination checkpoints; they do not replace required inspections.
Expected result: Everyone knows what is included, who performs it, and which decisions must happen before work advances.
Ask specifically who restores surfaces opened for the reroute. Plumbing access can affect adjacent rooms as well as the bathroom, so the repair scope should name those areas where known.
The sequence below separates layout approval from permission to conceal completed work. That separation prevents a finished surface from becoming the first place you discover an unresolved plumbing issue.
Rough-in and inspection coordination
Connect the plumbing work to the remodel schedule
- Confirm shutdown arrangements. Have the plumber identify the necessary isolation points and explain which fixtures or household areas will be affected. Tell occupants before the shutdown begins.
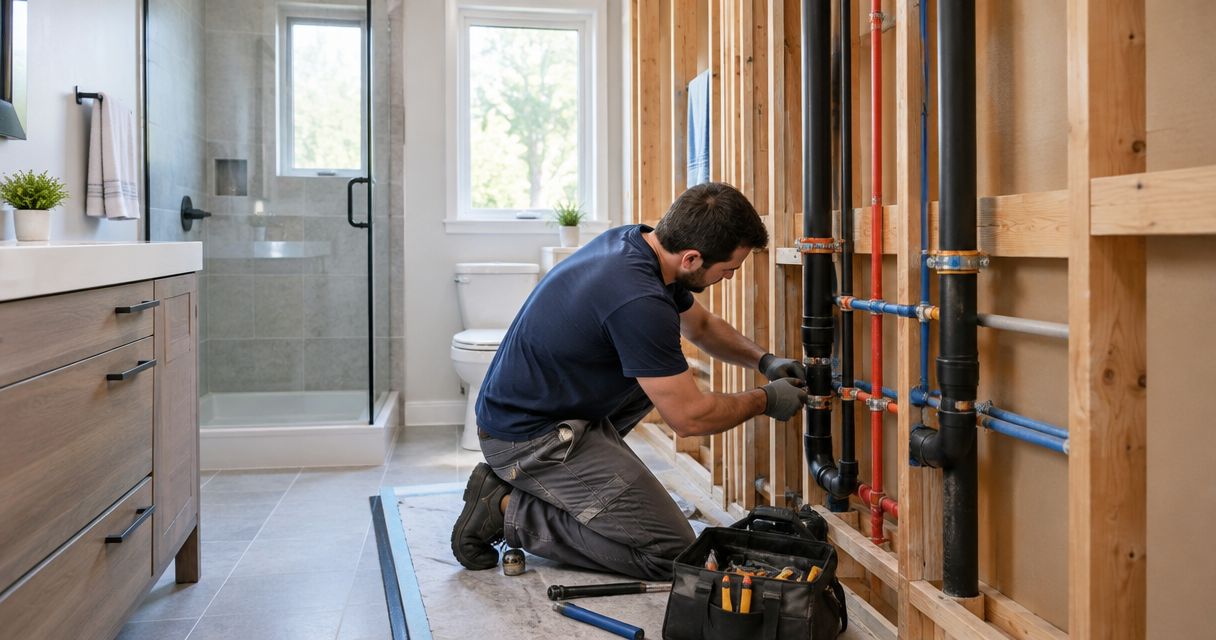
- Open only the agreed areas. Coordinate demolition with the contractor and plumber. Stop and reassess if exposed conditions differ from the plan; do not extend cutting into framing or other concealed systems without review.
- Verify the exposed route. Compare actual pipe locations, floor construction, and connection points with the proposed plan. Record any approved changes before rough-in proceeds.
- Coordinate fixture connections with finished dimensions. The plumber should use the selected fixtures’ installation instructions alongside the approved layout. Confirm valve access, drain positions, and connections before surrounding construction makes changes harder.
- Complete required testing and inspections. Assign responsibility for arranging them and recording the result. Keep the relevant work visible until the applicable authority permits concealment.
Expected result: The plumbing rough-in matches the approved arrangement, and the team has documented the checks needed before closing the affected construction.
Put inspection dependencies into your 2026 construction schedule. A calendar date alone is not permission to install wallboard, tile, or flooring over work awaiting required approval.
Avoid directing the plumber to solve a routing conflict by changing structural members. Plumbing feasibility and structural suitability are separate questions; both need an appropriate answer.
Surface closure and fixture installation
Release the bathroom for finishing
- Record the concealed work. Photograph pipe routes and relevant connections before closure. Keep the images with the approved plan and inspection records so future work does not depend on memory.
- Confirm closure authorization. Check that required plumbing inspections and tests are complete. Coordinate any other applicable inspections before the relevant walls or floors are covered.
- Restore the assembly, not just its appearance. Coordinate subfloor repairs, wall backing, shower construction, waterproofing, and finish materials. Plumbing approval alone does not establish that a shower assembly is ready for tile.
- Install and check the fixtures. Have the responsible installer verify operation, drainage, accessible connections, and shutoff access. Address leakage or malfunction before accepting the bathroom as complete.
- Collect the handoff documents. Keep fixture instructions, approved changes, relevant inspection records, and concealed-work photos together. Note unresolved items and assign responsibility for closing them.
Expected result: You receive a functioning bathroom and a usable record of what changed behind the finished surfaces.
For your 2026 closeout file, distinguish a completed task from an outstanding correction. A finished-looking room is not a substitute for documented completion of the agreed scope.
When the fixture layout changes after demolition
A second workflow applies when opened walls or floors reveal that the original route needs revision. Treat the discovery as a design change, not an informal instruction passed between trades.
- Pause the affected work. Identify which tasks depend on the disputed location or connection. Unrelated work should continue only where it does not lock in the unresolved decision.
- Document the actual condition. Add photos and measurements to the project record. Have the plumber explain the routing constraint in relation to the proposed fixtures.
- Compare the alternatives. Review retaining the original fixture position, adjusting the new position, or developing another compliant route. Include effects on structure, access, waterproofing, and finishes.
- Approve the revised scope. Confirm the changed work, responsible trades, and schedule effects in writing. Check whether the permit documents or inspection arrangements also need revision.
- Distribute 1 shared revision. Give everyone the same current drawing and identify superseded versions. Resume affected work only after the responsible parties understand the change.
Best for: Homeowners whose plumbing route cannot be fully established until access is opened. The benefit is a controlled response to real conditions; the limitation is that dependent finish work must wait for the decision.
Troubleshooting the handoffs
The new shower drain conflicts with floor framing
Stop the proposed cut and have the plumber coordinate with the appropriate structural professional. Review a different drain location or route before changing framing. A visually centered drain does not justify an unreviewed structural alteration.
The toilet fits the drawing but not the selected fixture
Compare the actual fixture’s installation instructions with the finished wall location and planned connection. Correct the layout before concealment. Do not substitute another toilet without checking its requirements against the same conditions.
The vanity conceals connections or blocks access
Review the cabinet’s internal layout alongside the supply, drain, and shutoff positions. Resolve conflicts before cabinet installation. Drawer boxes and cabinet partitions belong on the coordination drawing when they affect access.
The finish crew is ready before the plumbing inspection
Hold the affected closure work and confirm the inspection status with the responsible party. Reschedule dependent tasks rather than concealing unapproved work. Keep the release decision explicit so nobody mistakes another trade’s arrival for authorization.
A leak appears after fixture installation
Stop using the affected fixture and arrange assessment by the responsible installer or licensed plumber. Use an accessible shutoff only when you can do so safely. Do not cover staining or repair finishes until the source has been corrected and affected materials assessed.
Customize your workflow
Expand the shared plan beyond the plumbing when the remodel also changes lighting, ventilation, cabinetry, or accessibility features. Each added element needs an owner and a place in the sequence; do not let electrical work or cabinet installation become an unplanned obstacle to the plumbing route.
A Finishing Touch Remodeling offers bathroom remodeling, drywall, carpentry, flooring, and painting services. Discuss which of those services belong in your project and identify the separate responsibility for licensed plumbing work. The advantage is a clearly defined remodeling scope; the limitation is that a service list alone does not establish plumbing design, permitting, or inspection responsibility.
Use the contact page to outline your existing bathroom, intended fixture moves, and known access constraints. Bring the proposed layout and fixture information so the conversation starts with the work you actually need.
FAQ
What comes first in a bathroom remodel plumbing reroute?
Confirm the fixture layout and have a licensed plumber assess drainage, venting, and water connections before demolition. Identify concealed conditions that require investigation before treating the route as final.
Can I move a toilet during a bathroom remodel?
A toilet relocation requires a feasible drain and vent arrangement, suitable construction access, and compliance with applicable requirements. Have a licensed plumber assess the proposed position before committing to the layout.
Do I need a permit to reroute bathroom plumbing?
Confirm permit requirements with the authority having jurisdiction over your property before work begins. Describe the actual fixture moves and plumbing alterations rather than asking only whether a bathroom remodel needs a permit.
Is keeping bathroom plumbing in place better than moving it?
Keeping fixture locations is the better starting point when the current arrangement meets your needs. Moving fixtures supports a different layout but adds routing and construction coordination; existing connections still need assessment if retained.
When can walls close after a plumbing reroute?
Close affected walls only after required testing and inspections are complete and concealment is authorized. Coordinate other applicable inspections and the wall assembly requirements before finishing.
Who should coordinate the remodeler and plumber?
Name a project coordinator in the written scope before demolition. That person should maintain the current layout, track approvals, and communicate changes to every affected trade.
Does A Finishing Touch Remodeling serve bathroom remodeling clients locally?
A Finishing Touch Remodeling provides bathroom remodeling services to homeowners in the Conroe and Woodlands area. Confirm your project's scope and responsibility for plumbing work, permits, and inspections directly.
One last thing
Photograph the plumbing before it disappears. Include a wider view that shows where each pipe sits relative to recognizable walls and openings, not just close-ups of fittings. A connection photo without location context is harder to use when a future repair requires opening the wall.